本文章参考料神博客: https://www.liaosam.com/wordpress-on-linode-vps-setup-ssl-https-guide.html 非常感谢料神的文章,此文在此基础配置的我基本环境
前提:Linode 5 美金/月服务器,Centos7 系统,安装wordpress,PHP7.1,使用 WDCP 网站管理面板搭建基本环境,主网站和二级域名正常访问情况下,进行二级域名 https 配置!由于WDCP 面板可以一键对主域名配置 SSL,所以主域名 SSL 配置此文不再叙述…
先使用 ssh 工具(MAC 无需下载 SSH 工具,直接找到 terminal 终端输入 ssh root@ip 连接) 进入终端(以 root 权限进行配置):
一、安装 SSL 证书(Let’s Encrypt)
1)先安装 git 包
# yum update //更新 centos 系统
# yum install git //安装 git 工具,后面证书可通过此工具在线下载
2)下载证书包
# git clone https://github.com/certbot/certbot /opt/letsencrypt
3)进入证书目录
# cd /opt/letsencrypt
二、创建并部署 Let’s Encrypt SSL 证书
# ./certbot-auto certonly --standalone --email [email protected] -d xx.example.com
注:上面邮箱和域名请替换为自己的邮箱和二级域名
注意此过程中遇到:Problem binding to port 80: Could not bind to IPv4 or IPv6. 问题,
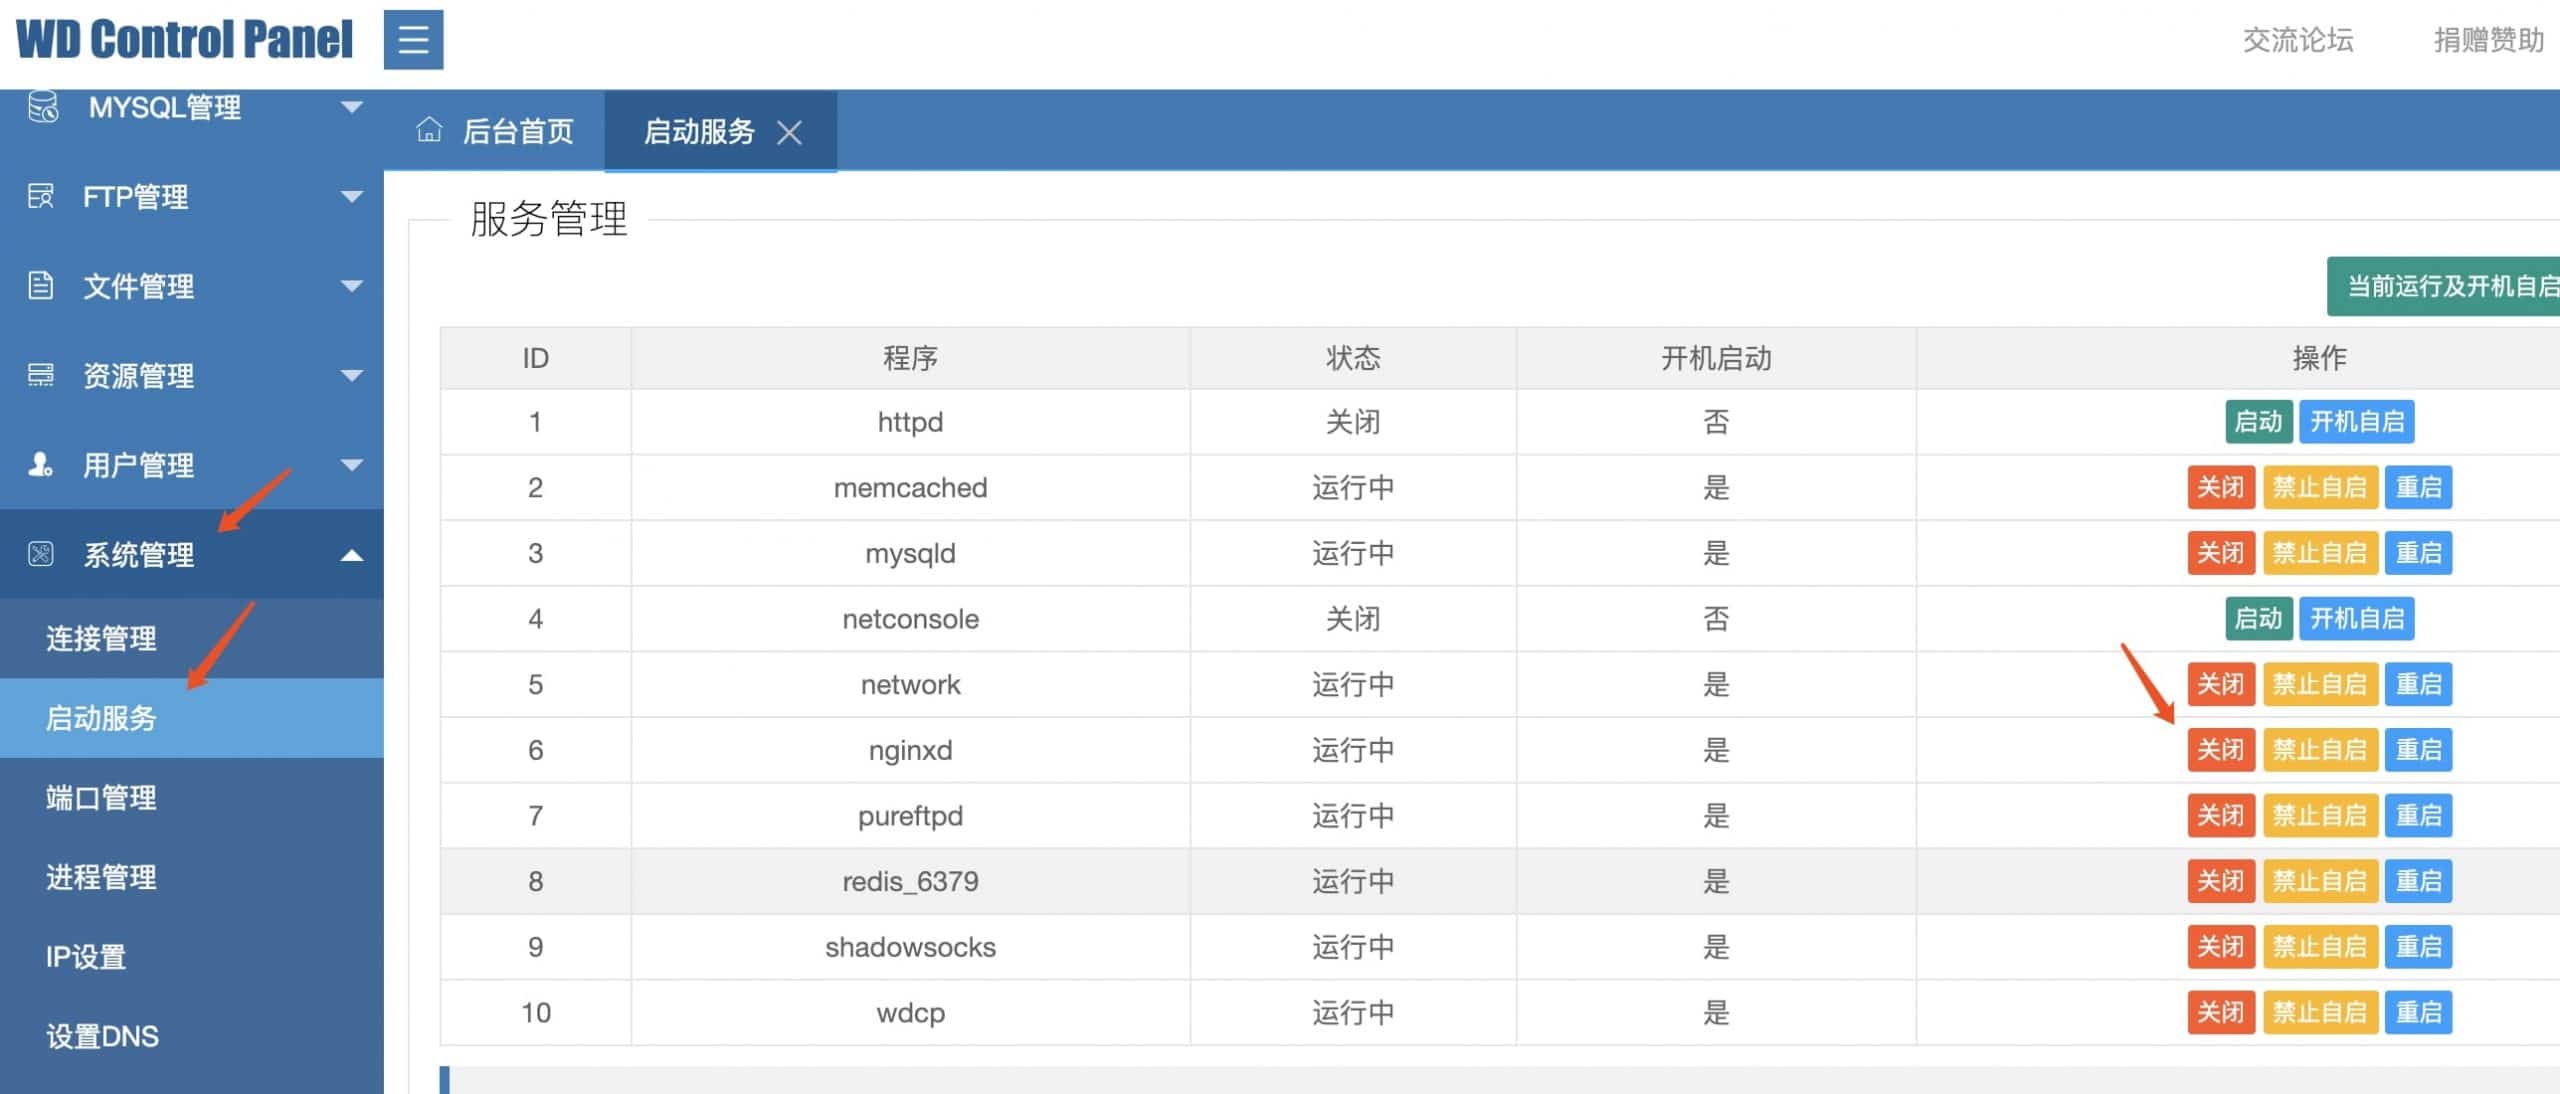
解决办法:只需要将 nginx 停止再重新运行上面证书生成命令即可。
Nginx停止如下所示:
三、对网站虚拟主机配置文件进行配置
# vi /www/wdlinux/nginx/conf/vhost/xx.example.com.conf
server {
        listen       443;
        root /www/web/xx_example_com;  //网站所在目录
        ssl                  on;
        ssl_certificate      /etc/letsencrypt/live/xx.example.com/fullchain.pem;
        ssl_certificate_key  /etc/letsencrypt/live/xx.example.com/privkey.pem;
        ssl_prefer_server_ciphers on;
        ssl_session_timeout 10m;
        ssl_protocols TLSv1 TLSv1.1 TLSv1.2;
        ssl_ciphers EECDH+CHACHA20:EECDH+AES128:RSA+AES128:EECDH+AES256:RSA+AES256:EECDH+3DES:RSA+3DES:!MD5;
        server_name xx.example.com;
        index  index.html index.php index.htm;
        error_page  400 /errpage/400.html;
        error_page  403 /errpage/403.html;
        error_page  404 /errpage/404.html;
        error_page  503 /errpage/503.html;
        location ~ .php(.<em>)$ {
                fastcgi_pass  unix:/tmp/php-71-cgi.sock;
                fastcgi_index  index.php;
                fastcgi_param  SCRIPT_FILENAME  $DOCUMENT_ROOT$fastcgi_script_name;
                fastcgi_param PATH_INFO $2;
                include fcgi.conf;
        }
        location ~ .</em>.(gif|jpg|jpeg|png|bmp|swf)$ {
                expires      1d;
        }
        location ~ .*.(js|css|html|htm)?$ {
                expires      12h;
        }
        location ~ /.ht {
            deny  all;
    }
        location / {
                 try_files $uri $uri/ /?$args;
        }
        include /www/wdlinux/wdcp/rewrite/wp_nginx.conf;
(上面一行为 rewrite 规则,请替换自行替换或删除此规则)
}
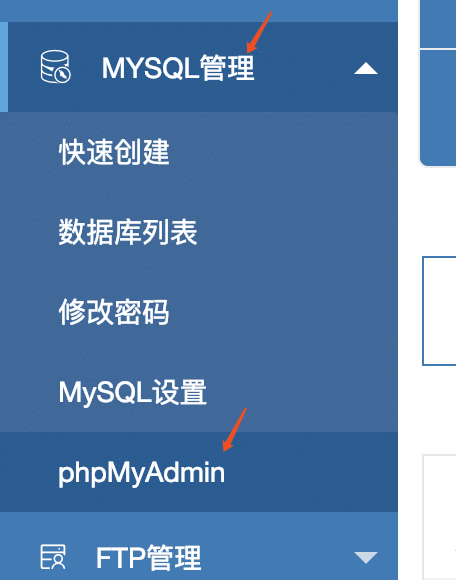
在WDCP 面板中进入 phpmyadmin:(使用 mysql root 用户名密码进入)
找对对应网站数据库,修改以下表 xxx_options 中的 siteurl 和 home 记录为 https://xxx.example.com
重启 nginx 服务和 mysql 服务后,就可配置成功。


